What this is for#
Your sender reputation is the single biggest factor in whether your campaigns land in the inbox or in spam. Mailbox providers (Gmail, Yahoo, Outlook) judge every email against a rolling score of your bounces, complaints, and engagement — a dirty list quietly drags that score down for months before you notice the open-rate drop.
AcelleMail gives you three concrete tools to keep a list healthy without leaving the app: per-list email verification, the Subscribers tab's Status + Verification filters, and a customer-managed Blacklist. This guide shows where each one is, what it does, and the order to use them in.
Step 1 — Verify every list at least once#
The fastest payoff is a one-time verification pass on every list. AcelleMail runs each email through a verification server that checks DNS, mailbox existence, and known-bad patterns, then tags each subscriber with the result.
Open your list, switch to the Email verification tab in the top navigation. URL: /rui/lists/<list-uid>/verification.
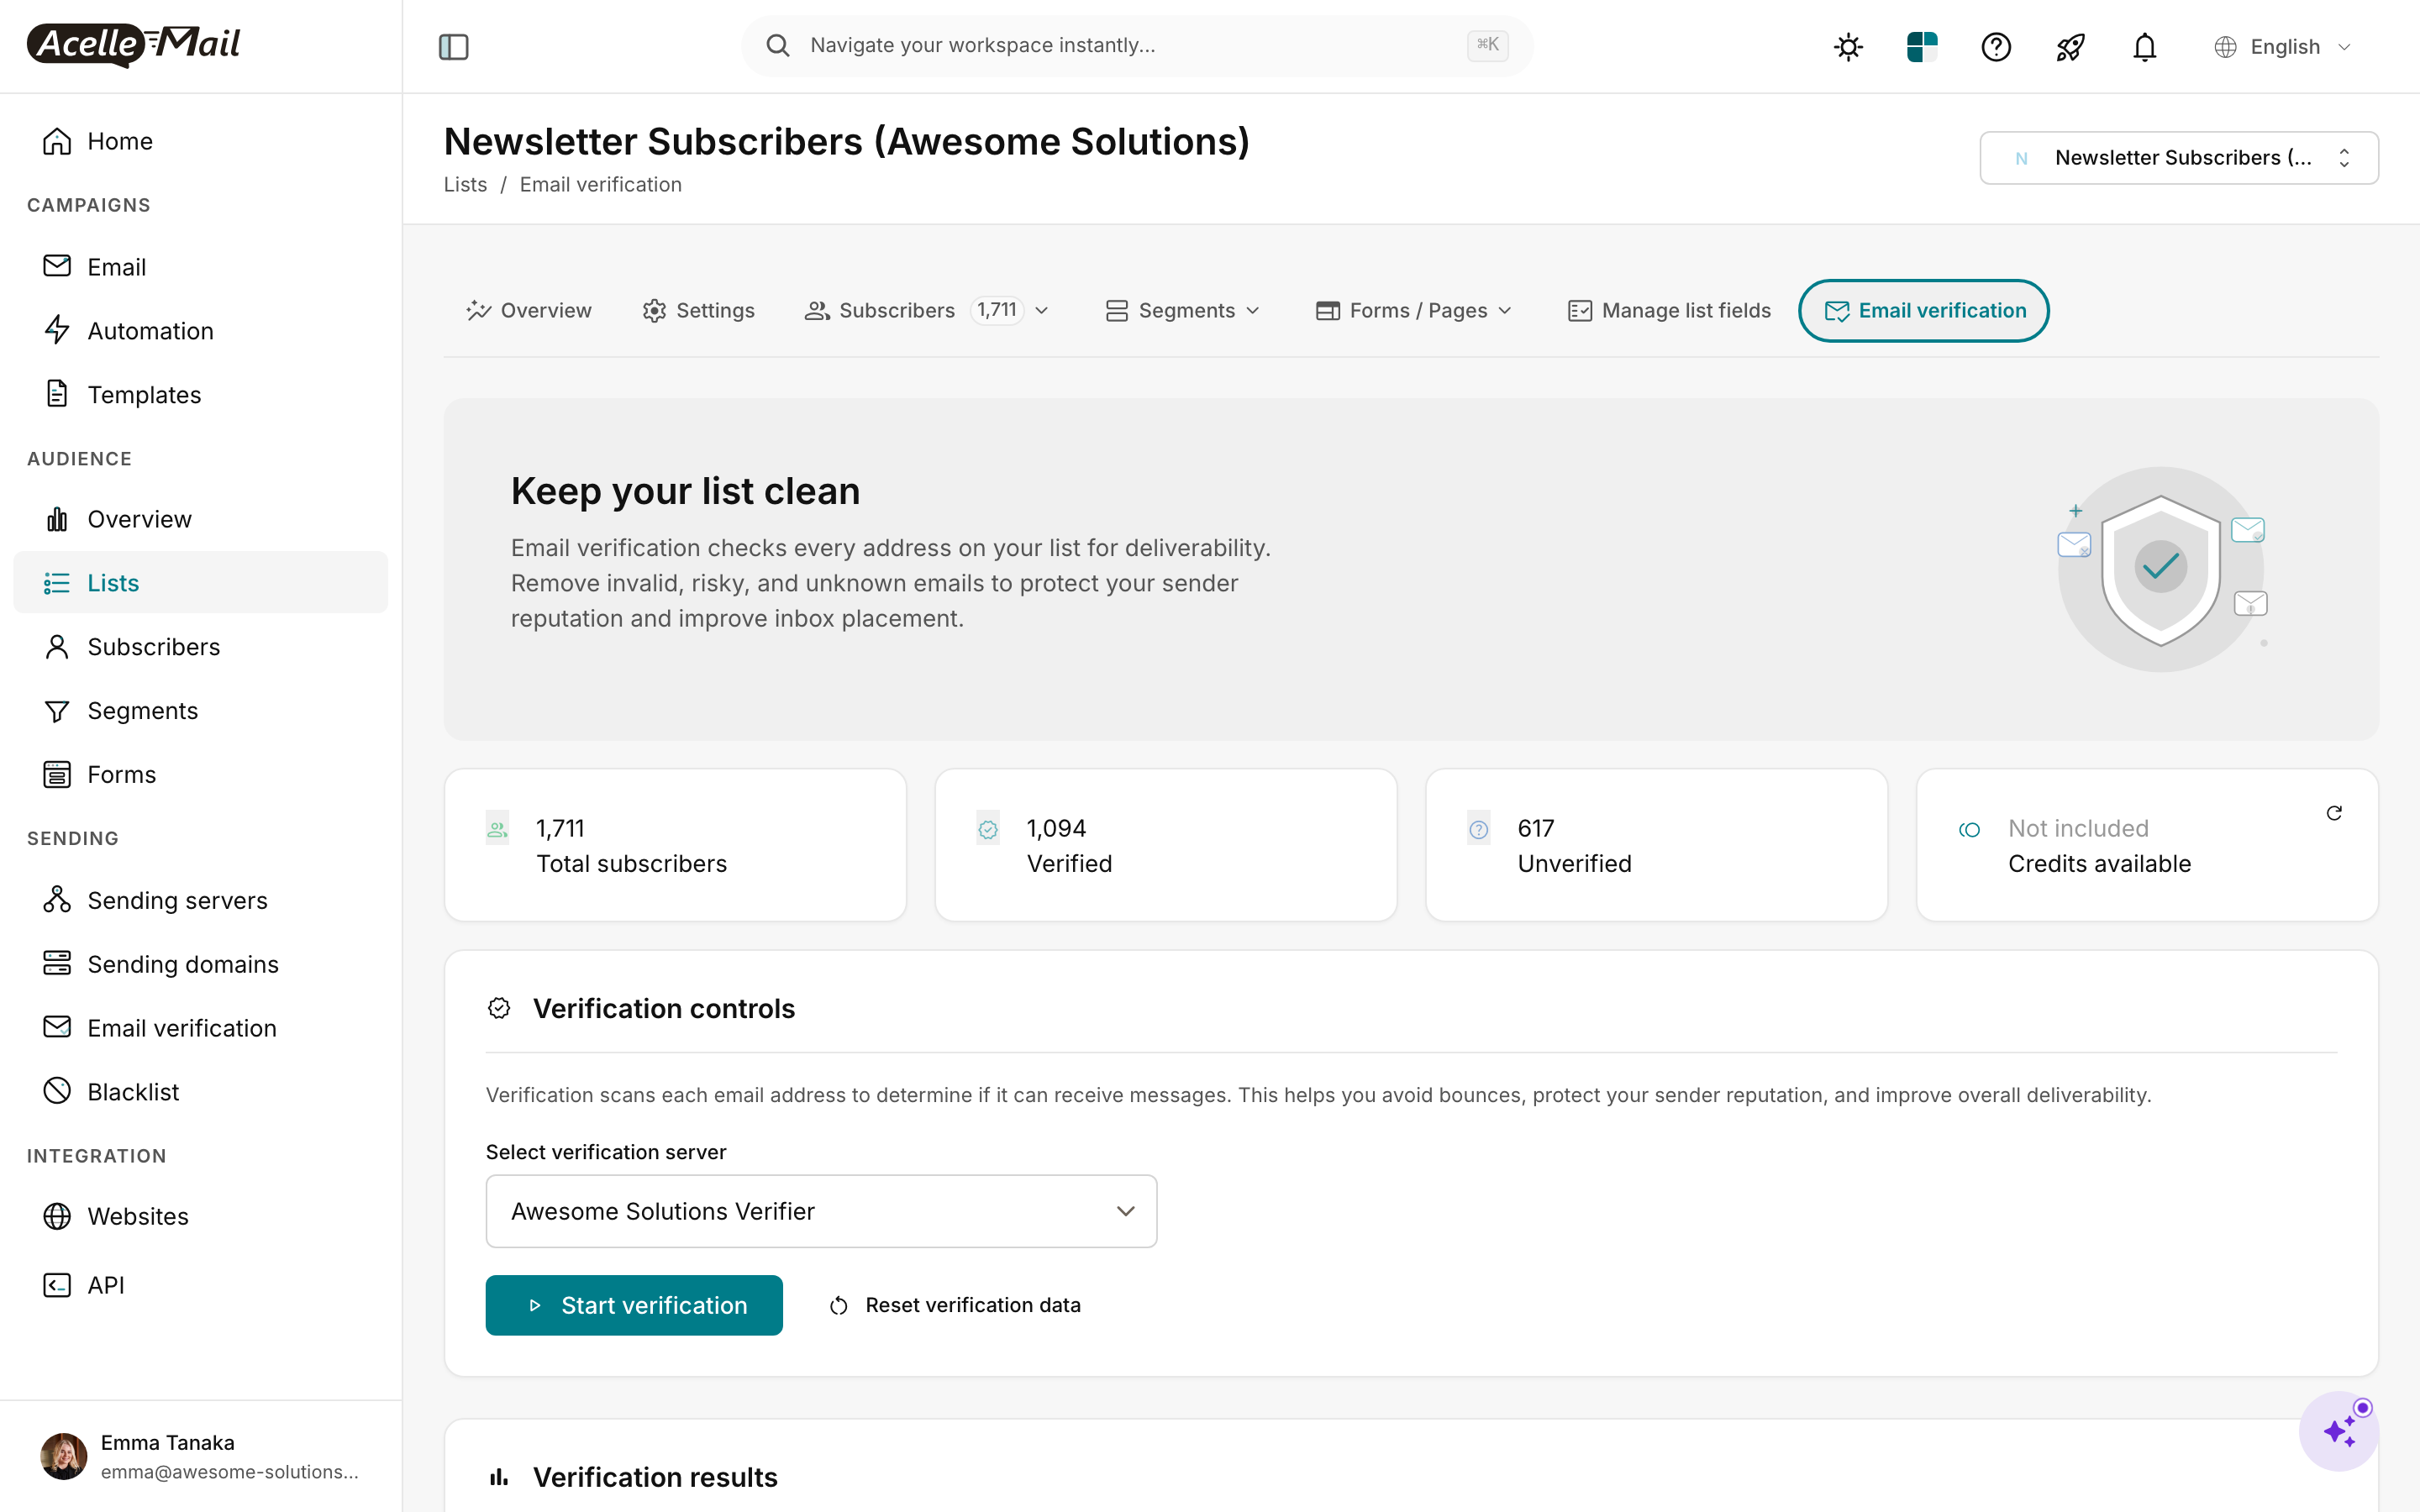
What you see:
- Stat cards at the top — Total / Verified / Unverified / Credits available. The gap between Total and Verified is your work-in-progress. Credits are paid per address checked (your admin configures the verification server's pricing).
- Select verification server dropdown — your admin connects one or more verifiers (Athena EV is AcelleMail's first-party option; external services plug in here too). If the dropdown is empty, the verification server isn't configured yet — ask your admin to set one up under Sending → Email verification.
- Start verification — kicks off a background job that walks every unverified subscriber in this list. Closes the UI; the job continues. You can come back later and see progress.
- Reset verification data — clears all prior verification results. Use sparingly; you'll pay credits again to re-verify.
Click Start verification. The job runs in the background — close the tab and come back in 10–30 minutes depending on list size.
What does verification actually catch? Four bucket-states are returned per address: Deliverable (safe to send), Risky (catch-all servers, role addresses), Undeliverable (rejected by the destination), and Unknown (couldn't determine). Treat Risky and Undeliverable as "do not send" until you've manually reviewed them.
Step 2 — Filter Subscribers by Status + Verification#
Once verification finishes, the Subscribers tab gets a lot more powerful. Switch to Subscribers in the list nav.
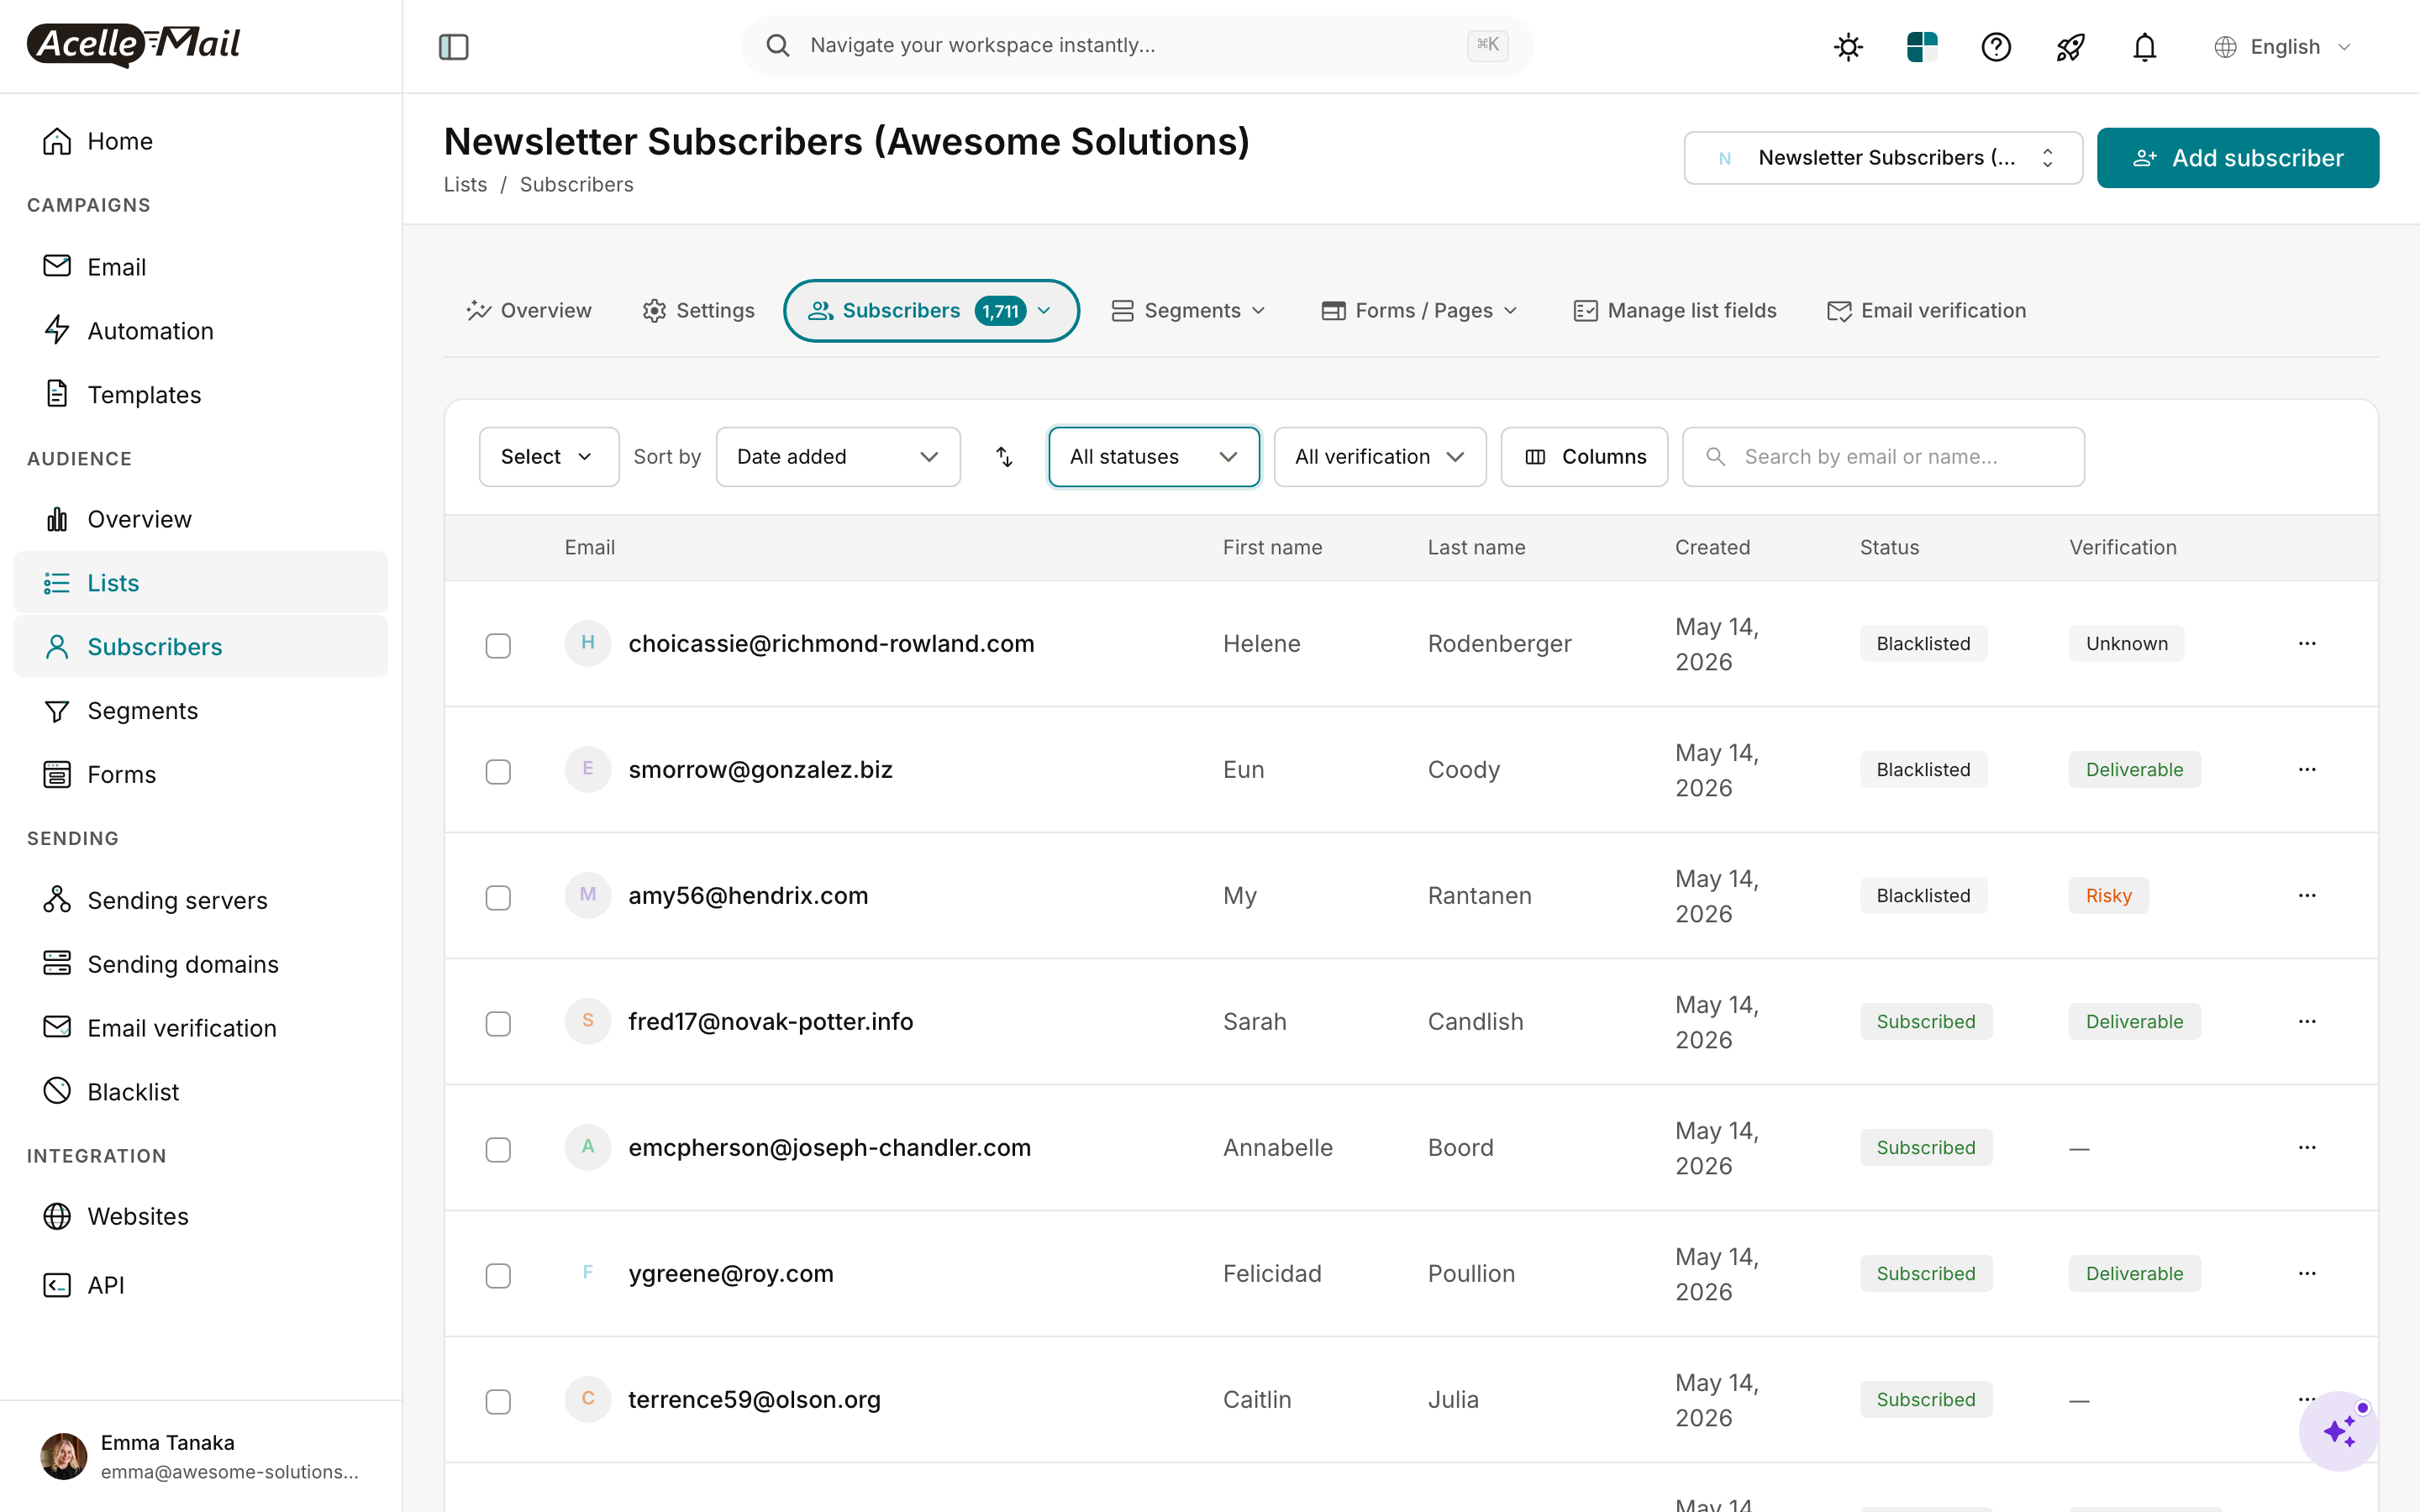
Two filter dropdowns at the top do the heavy lifting:
| Filter |
Values it offers |
What it means |
| All statuses |
Subscribed · Unconfirmed · Unsubscribed · Bounced · Blacklisted |
The subscription state — only Subscribed receives campaigns |
| All verification |
Deliverable · Risky · Undeliverable · Unknown · Not verified |
Verification verdict from Step 1 |
The row-level badges in the table reflect the same two columns. Verification "—" means the subscriber hasn't been run through verification yet — they'll be included in the next Start verification run.
Combos worth bookmarking:
| Filter combo |
Use case |
| Status = Bounced |
Subscribers AcelleMail has already auto-marked from bounce events — review and remove |
| Status = Subscribed + Verification = Undeliverable |
Highest-priority cleanup — they're getting your campaigns but will bounce |
| Status = Subscribed + Verification = Risky |
Borderline — keep for now, but exclude from high-volume sends |
| Status = Unconfirmed (older than 7 days) |
Double opt-in dropouts who never confirmed |
| Status = Subscribed + Verification = Unknown |
Run Start verification again |
Use the row checkboxes + bulk actions to move filtered subscribers in batches: Move to blacklist, Delete, or copy to another list.
Step 3 — Maintain the customer Blacklist#
When you blacklist a subscriber, they get permanently blocked from receiving any campaign you send — even if they're added back to a list later (e.g. via re-import). Open Blacklist in the left sidebar (under Sending). URL: /rui/sending/blacklist.
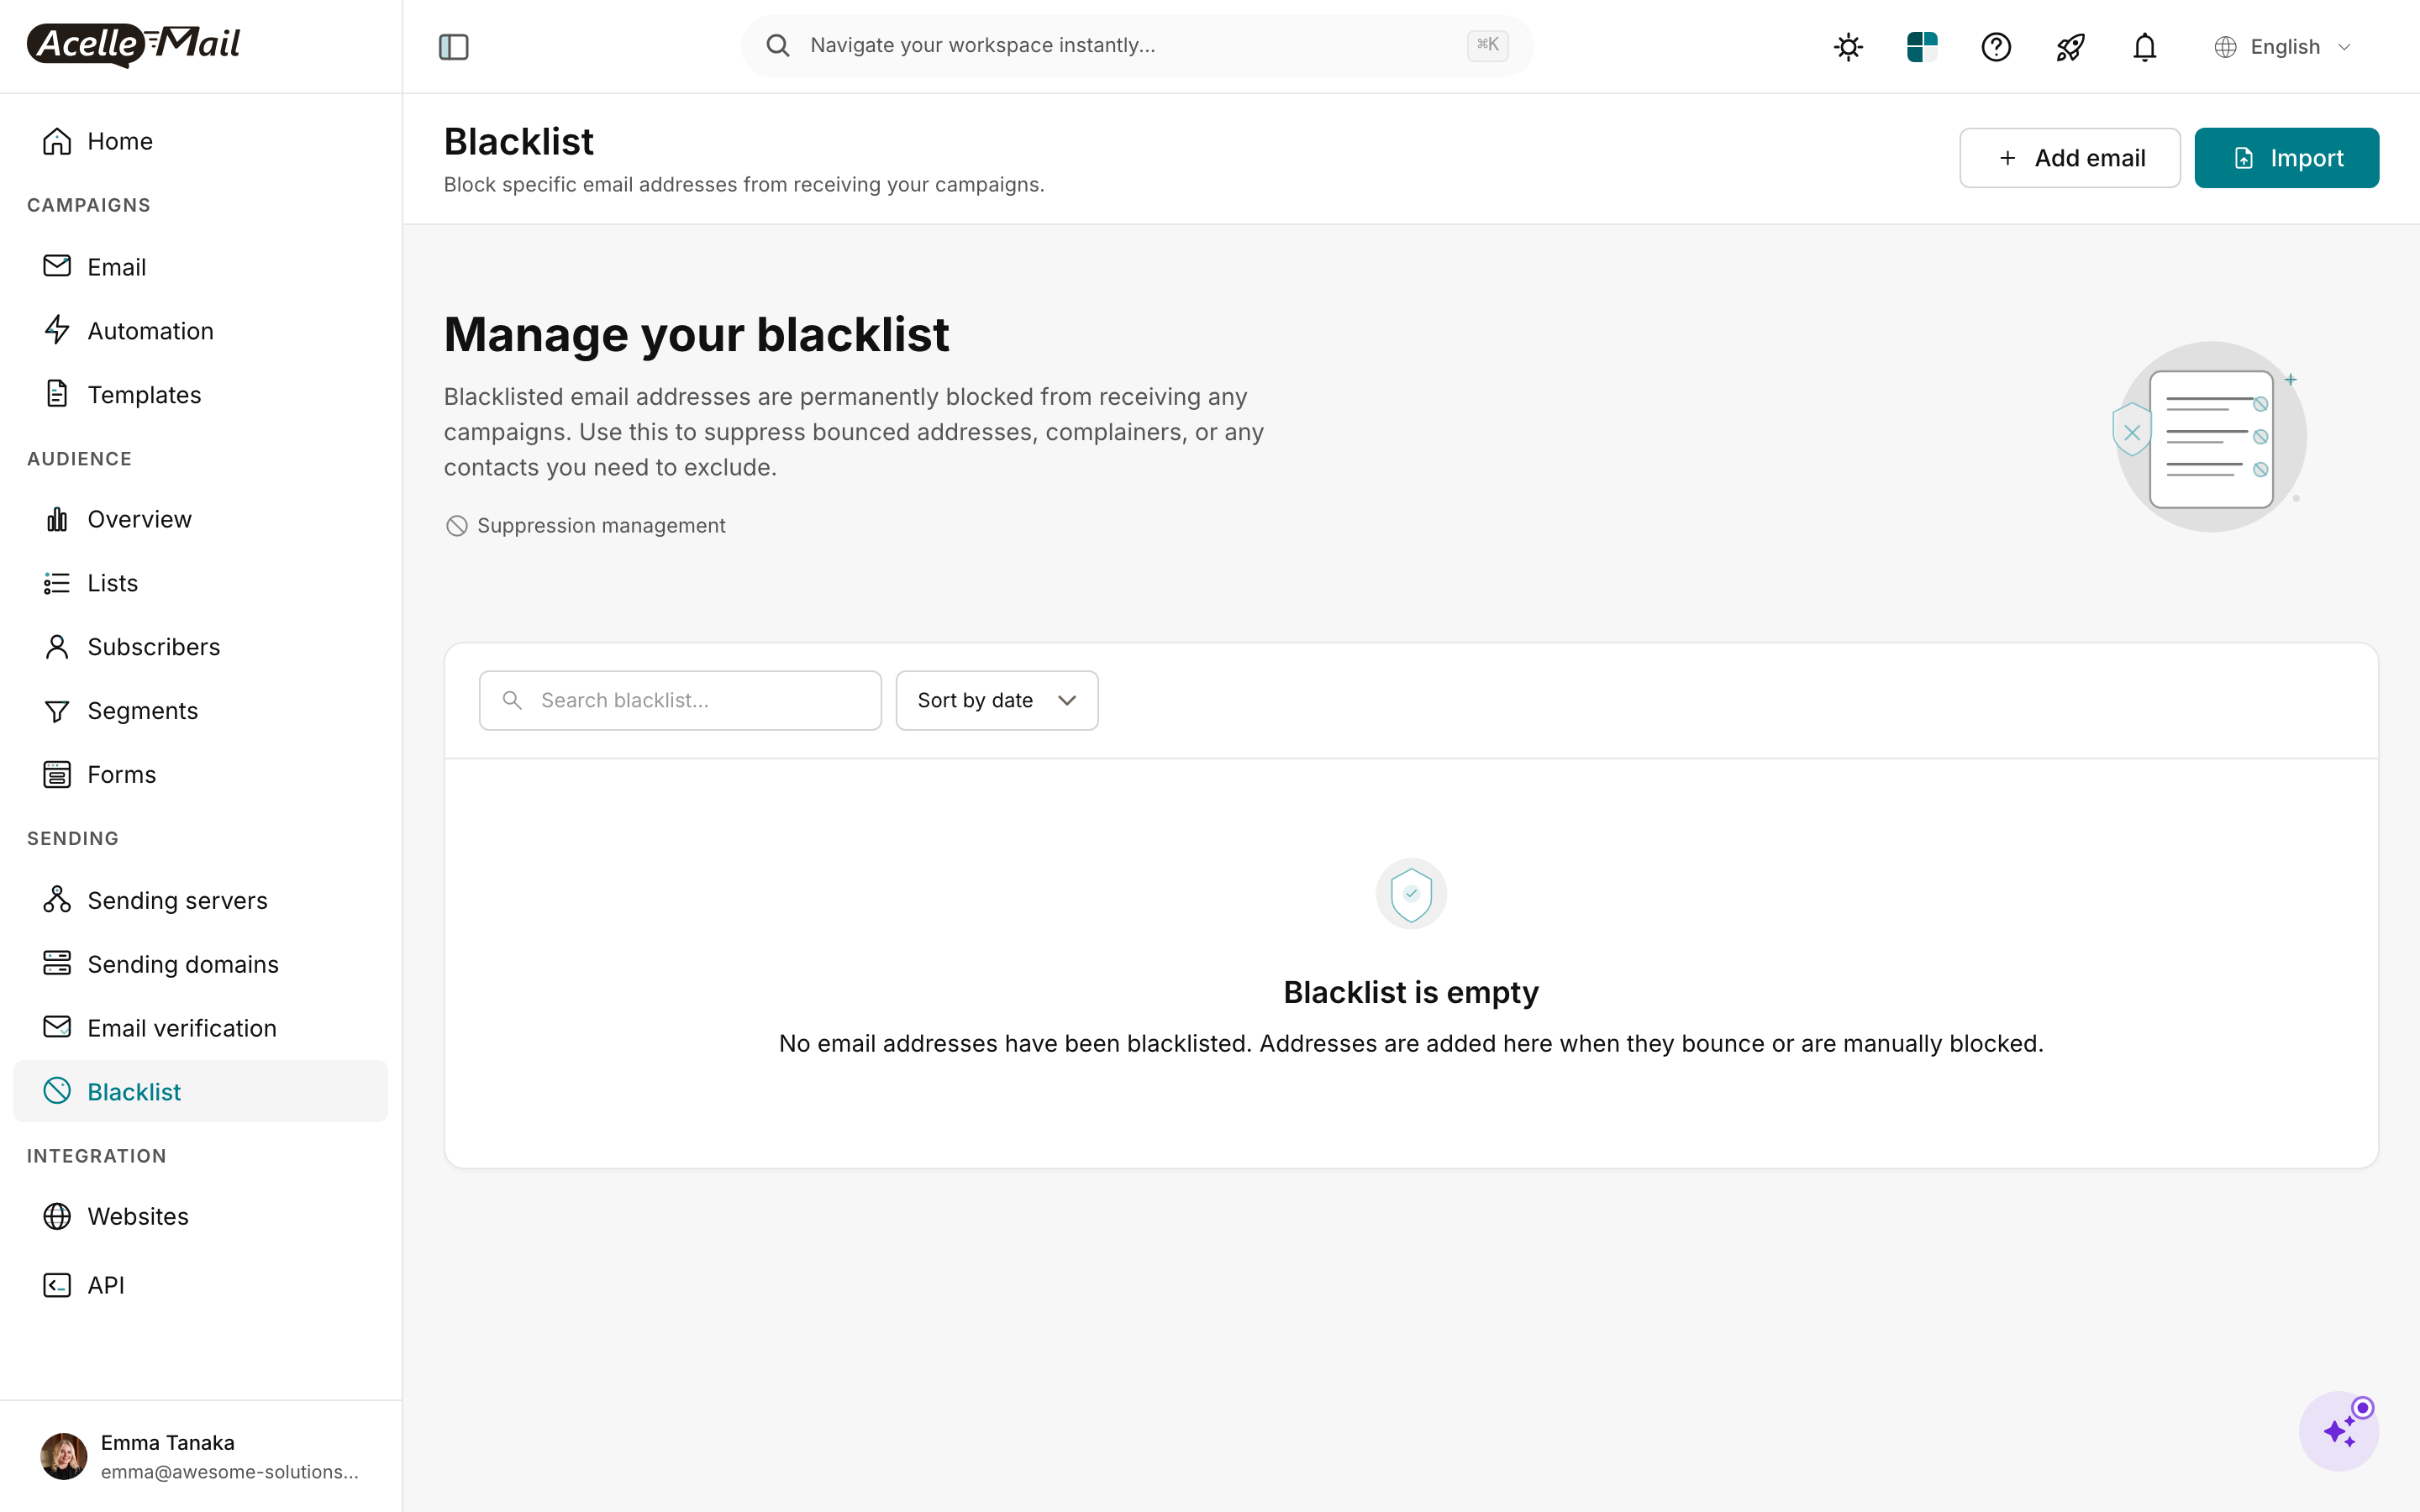
Three ways addresses land on the blacklist:
- Automatic from bounces. When AcelleMail's bounce handler classifies a hard bounce, the address auto-blacklists. You don't need to do anything.
- Bulk add via Import. Click Import top-right and paste a CSV of addresses you want to suppress (e.g. a contractor list, prior unsubscribes from another tool).
- Manual add. Click + Add email for one-off blocks — useful when a complainer reaches out directly.
The blacklist is account-wide — once an address is on it, no list owned by your customer can send to it. That's the right default; you don't want a complainer accidentally re-added through a separate signup form.
Don't blacklist live engaged subscribers. If someone just unsubscribed, they're already in the Unsubscribed status — campaigns skip them automatically. Only blacklist when you want a hard, permanent block (complaints, spam-trap suspects, legal requests).
A practical hygiene schedule#
| Task |
Frequency |
Where in AcelleMail |
| Auto-remove hard bounces |
Continuous (AcelleMail does this) |
Visible under Subscribers / Status = Bounced |
| Full verification sweep on imported lists |
Before the first campaign |
Email verification tab → Start verification |
| Verification sweep on growing lists |
Quarterly |
Same |
| Audit Unconfirmed older than 7 days |
Weekly during DOI rollout, monthly steady-state |
Subscribers / Status = Unconfirmed |
| Audit "Subscribed + Undeliverable" |
After every verification sweep |
Subscribers / Status=Subscribed & Verification=Undeliverable |
| Re-engagement campaign on inactives |
Every 6 months |
Build a segment (Last opened email > 180 days) + run a re-engagement campaign |
| Manual blacklist additions |
As complaints arrive |
Sending → Blacklist → + Add email |
Three signs your hygiene is paying off:
- Bounce rate per campaign trends down below 2% hard bounce (visible on each campaign's report).
- Verified percentage on the verification page climbs over time as you remove undeliverables.
- Inbox placement (visible via Google Postmaster / Microsoft SNDS once you connect those) improves over the same period.
Common issues#
| What you see |
What to do |
| Verification dropdown is empty |
Your admin hasn't connected a verification server. Ask them to set one up under Sending → Email verification (admin view). |
| "Credits available" shows 0 |
Verification servers charge per address. Buy credits or rotate to a server with remaining balance via the dropdown. |
| Verification job is stuck for hours |
Open the Verification results card lower on the page — there's a Stop verification button to cancel. Then re-start. |
| Status column shows lots of "Bounced" but you've never sent |
These were imported from a CSV that pre-flagged statuses, or AcelleMail processed bounces from a previous customer. Delete or blacklist as appropriate. |
| You verified the list but Subscribed campaigns still bounce |
Verification is a snapshot. Addresses go stale — re-run quarterly. Also check that your Sending domain has DKIM/SPF set up; verification doesn't fix authentication problems. |
| Customer blacklist shows addresses you didn't add |
They were auto-added by the bounce handler. That's the system working correctly; do not remove unless you can confirm the bounce was a one-off. |
What NOT to do#
- Don't bulk-delete Bounced or Undeliverable subscribers from the list — blacklist them instead. Deletion lets them re-enter on the next signup form submission. Blacklist makes the block permanent.
- Don't run verification on every import day-one. Verification servers cost per check. Plan your runs around campaign sends — verify a week before a big send, not on the day a single subscriber joins.
- Don't ignore the Risky bucket. Catch-all servers (
*@company.com accepts everything) accept the email but never deliver it to a real human. Risky = unengaged = drag on your reputation.
- Don't manually maintain a CSV of bounces outside AcelleMail. Use the built-in Bounced status filter and the blacklist. Anything that lives in a spreadsheet is one rename away from being lost.
Related articles#
